Keeping your Jupyter notebook code quality bar high (and production ready) with Ploomber
Abstract
This paper walks through this interactive tutorial. It is highly recommended running this interactively so it’s easier to follow and see the results in real-time. There’s a binder link in there as well, so you can launch it instantly.
Introduction
Notebooks are an excellent environment for data exploration: they allow us to write code interactively and get visual feedback, providing an unbeatable experience for understanding our data.
However, this convenience comes at a cost; if we are not careful about adding and removing code cells, we may have an irreproducible notebook. Arbitrary execution order is a prevalent problem: a recent analysis found that about 36% of notebooks on GitHub did not execute in linear order. To ensure our notebooks run, we must continuously test them to catch these problems.
A second notable problem is the size of notebooks: the more cells we have, the more difficult it is to debug since there are more variables and code involved.
Software engineers typically break down projects into multiple steps and test continuously to prevent broken and unmaintainable code. However, applying these ideas for data analysis requires extra work; multiple notebooks imply we have to ensure the output from one stage becomes the input for the next one. Furthermore, we can no longer press “Run all cells” in Jupyter to test our analysis from start to finish.
Ploomber provides all the necessary tools to build multi-stage, reproducible pipelines in Jupyter that feel like a single notebook. Users can easily break down their analysis into multiple notebooks and execute them all with a single command.
Refactoring a legacy notebook
If you already have a python project in a single notebook, you can use our tool Soorgeon to automatically refactor it into a Ploomber pipeline. Soorgeon statically analyzes your code, cleans up unnecessary imports, and makes sure your monolithic notebook is broken down into smaller components. It does that by scanning the markdown in the notebook and analyzing the headers; each H2 header in our example is marking a new self-contained task. In addition, it can transform a notebook to a single-task pipeline and then the user can split it into smaller tasks as they see fit.
To refactor the notebook, we use the soorgeon refactor command:
soorgeon refactor nb.ipynbAfter running the refactor command, we can take a look at the local directory and see that we now have multiple python tasks which that are ready for production:
ls playgroundWe can see that we have a few new files. pipeline.yaml contains the
pipeline declaration, and tasks/ contains the stages that Soorgeon
identified based on our H2 Markdown headings:
ls playground/tasksOne of the best ways to onboard new people and explain what each workflow is doing
is by plotting the pipeline (note that we’re now using ploomber, which
is the framework for developing pipelines):
ploomber plotThis command will generate the plot below for us, which will allow us to stay up to date with changes that are happening in our pipeline and get the current status of tasks that were executed or failed to execute.

Figure 1:In this pipeline none of the tasks were executed - it’s all red.
Soorgeon correctly identified the stages in our original nb.ipynb
notebook. It even detected that the last two tasks
(linear-regression, and random-forest-regressor) are independent
of each other!
We can also get a summary of the pipeline with ploomber status:
cd playground
ploomber status
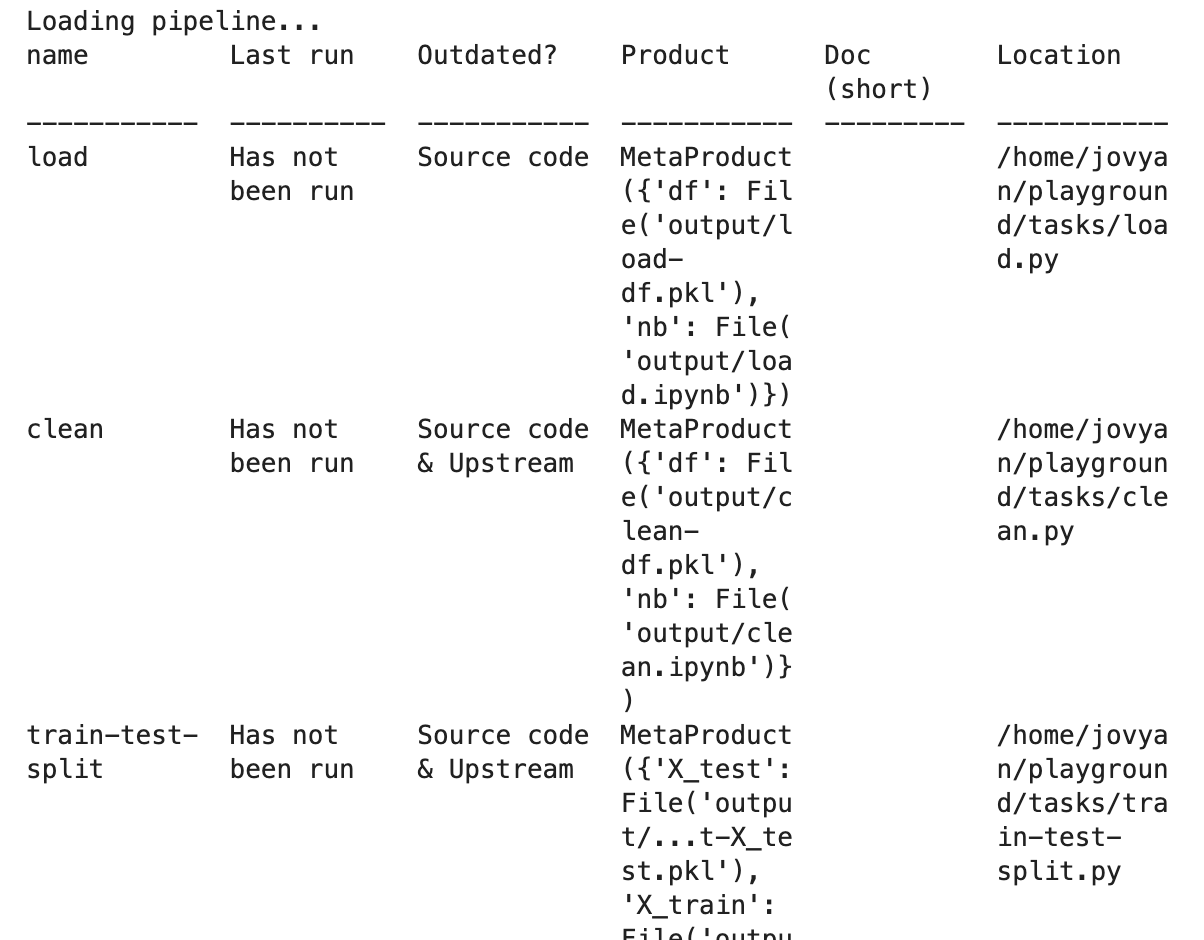
Figure 2:In here we can see the status of each of our pipeline’s tasks, runtime and location.
The pipeline.yaml file
To develop a pipeline, users create a pipeline.yaml file and declare
the tasks and their outputs as follows:
tasks:
  - source: script.py
    product:
      nb: output/executed.ipynb
      data: output/data.csv

  # more tasks here...
The previous pipeline has a single task (script.py) and generates
two outputs: output/executed.ipynb and output/data.csv. You may
be wondering why we have a notebook as an output: Ploomber converts
scripts to notebooks before execution; hence, our script is considered
the source and the notebook a byproduct of the execution. Using scripts
as sources (instead of notebooks) makes it simpler to use git. However,
this does not mean you have to give up interactive development since
Ploomber integrates with Jupyter, allowing you to edit scripts as
notebooks.
In this case, since we used soorgeon to refactor an existing
notebook, we did not have to write the pipeline.yaml file.
Building the pipeline
Let’s build the pipeline (this will take ~30 seconds):
cd playground
ploomber build
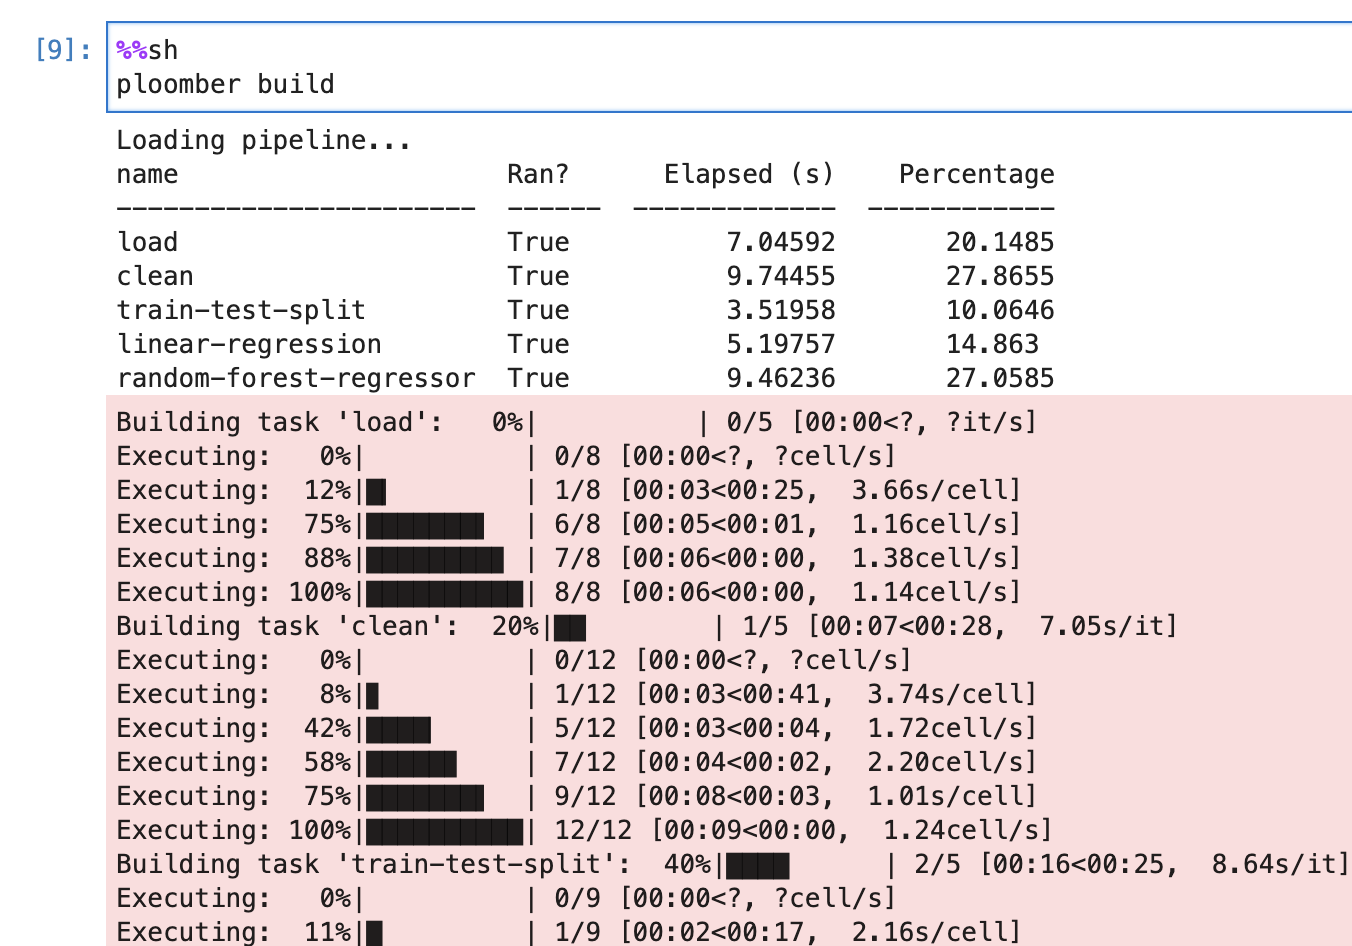
We can see which are the tasks that ran during this command, how long they took to execute, and the contributions of each task to the overall pipeline execution runtime.

Figure 3:Here we can see the build outputs
Navigate to playground/output/ and you’ll see all the outputs: the
executed notebooks, data files and trained model.
ls playground/output
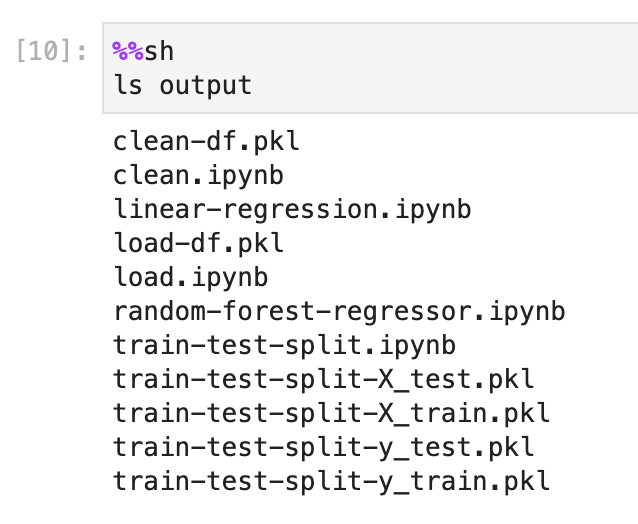
Figure 4:These are the post build artifacts
In this figure, we can see all of the data that was collected during the pipeline, any artifacts that might be useful to the user, and some of the execution history that is saved on the notebook’s context.
Testing and quality checks
** Open tasks/train-test-split.py as a notebook by right-clicking on it and then Open With -> Notebook and add the following code after the cell with # noqa:
# Sample data quality checks after loading the raw data
# Check nulls
assert not df['HouseAge'].isnull().values.any()

# Check a specific range - no outliers
assert df['HouseAge'].between(0,100).any()

# Exact expected row count
assert len(df) == 11085
** We’ll do the same for tasks/linear-regression.py, open the file and add the tests:
# Sample tests after the notebook ran
# Check task test input exists
assert Path(upstream['train-test-split']['X_test']).exists()

# Check task train input exists
assert Path(upstream['train-test-split']['y_train']).exists()

# Validating output type
assert 'pkl' in upstream['train-test-split']['X_test']
Adding these snippets will allow us to validate that the data we’re looking for exists and has the quality we expect. For instance, in the first test we’re checking there are no missing rows, and that the data sample we have are for houses up to 100 years old.
In the second snippet, we’re checking that there are train and test inputs which are crucial for training the model.
Maintaining the pipeline
Let’s look again at our pipeline plot:
Image('playground/pipeline.png')
The arrows in the diagram represent input/output dependencies
and depict the execution order. For example, the first task (load) loads
some data, then clean uses such data as input and processes it, then
train-test-split splits our dataset into training and test sets. Finally,
we use those datasets to train a linear regression and a random forest
regressor.
Soorgeon extracted and declared this dependencies for us, but if we want to modify the existing pipeline, we need to declare such dependencies. Let’s see how.
We can also see that the pipeline is green, meaning all of the tasks in it have been executed recently.
Adding a new task
Let’s say we want to train another model and decide to try Gradient
Boosting
Regressor.
First, we modify the pipeline.yaml file and add a new task:
Open playground/pipeline.yaml and add the following lines at the end
- source: tasks/gradient-boosting-regressor.py
  product:
    nb: output/gradient-boosting-regressor.ipynb
Now, let’s create a base file by executing ploomber scaffold:
cd playground
ploomber scaffold
This is the output of the command:
` Found spec at 'pipeline.yaml' Adding /Users/ido/ploomber-workshop/playground/ tasks/ gradient-boosting-regressor.py... Created 1 new task sources. `
We can see it created the task sources for our new task, we just have to fill those in right now.
Let’s see how the plot looks now:
cd playground
ploomber plot
Figure 6:Now we see an independent new task
You can see that Ploomber recognizes the new file, but it does not have
any dependency, so let’s tell Ploomber that it should execute after
train-test-split:
Open
playground/tasks/gradient-boosting-regressor.pyas a notebook by right-clicking on it and then Open With -> Notebook:

Figure 7:lab-open-with-notebook
At the top of the notebook, you’ll see the following:
upstream = NoneThis special variable indicates which tasks should execute before the
notebook we’re currently working on. In this case, we want to get
training data so we can train our new model so we change the
upstream variable:
upstream = ['train-test-split']Let’s generate the plot again:
cd playground
ploomber plot
Figure 8:The new task is attached to the pipeline
Ploomber now recognizes our dependency declaration!
Open
playground/tasks/gradient-boosting-regressor.pyas a notebook by right-clicking on it and then Open With -> Notebook and add the following code:
from pathlib import Path
import pickle

import seaborn as sns
from sklearn.ensemble import GradientBoostingRegressor

y_train = pickle.loads(Path(
   upstream['train-test-split']['y_train']).read_bytes())
y_test = pickle.loads(Path(
   upstream['train-test-split']['y_test']).read_bytes())
X_test = pickle.loads(Path(
   upstream['train-test-split']['X_test']).read_bytes())
X_train = pickle.loads(Path(
   upstream['train-test-split']['X_train']).read_bytes())

gbr = GradientBoostingRegressor()
gbr.fit(X_train, y_train)

y_pred = gbr.predict(X_test)
sns.scatterplot(x=y_test, y=y_pred)
Incremental builds
Data workflows require a lot of iteration. For example, you may want to generate a new feature or model. However, it’s wasteful to re-execute every task with every minor change. Therefore, one of Ploomber’s core features is incremental builds, which automatically skip tasks whose source code hasn’t changed.
Run the pipeline again:
cd playground
ploomber build
You can see that only the gradient-boosting-regressor task ran!
Incremental builds allow us to iterate faster without keeping track of task changes.
Check out playground/output/gradient-boosting-regressor.ipynb, which contains the output notebooks with the model evaluation plot.
Parallel execution and Ploomber cloud execution
This section can run locally or on the cloud. To setup the cloud we’ll need to register for an api key
Ploomber cloud allows you to scale your experiments into the cloud without provisioning machines and without dealing with infrastrucutres.
Open playground/pipeline.yaml and add the following code instead of the source task:
- source: tasks/random-forest-regressor.pyThis is how your task should look like in the end
- source: tasks/random-forest-regressor.py
  name: random-forest-
  product:
    nb: output/random-forest-regressor.ipynb
  grid:
        # creates 4 tasks (2 * 2)
        n_estimators: [5, 10]
        criterion: [gini, entropy]
In addition, we’ll need to add a flag to tell the pipeline to execute in parallel.
Open playground/pipeline.yaml and add the following code above the -tasks section (line 1):
# Execute independent tasks in parallel
executor: parallel
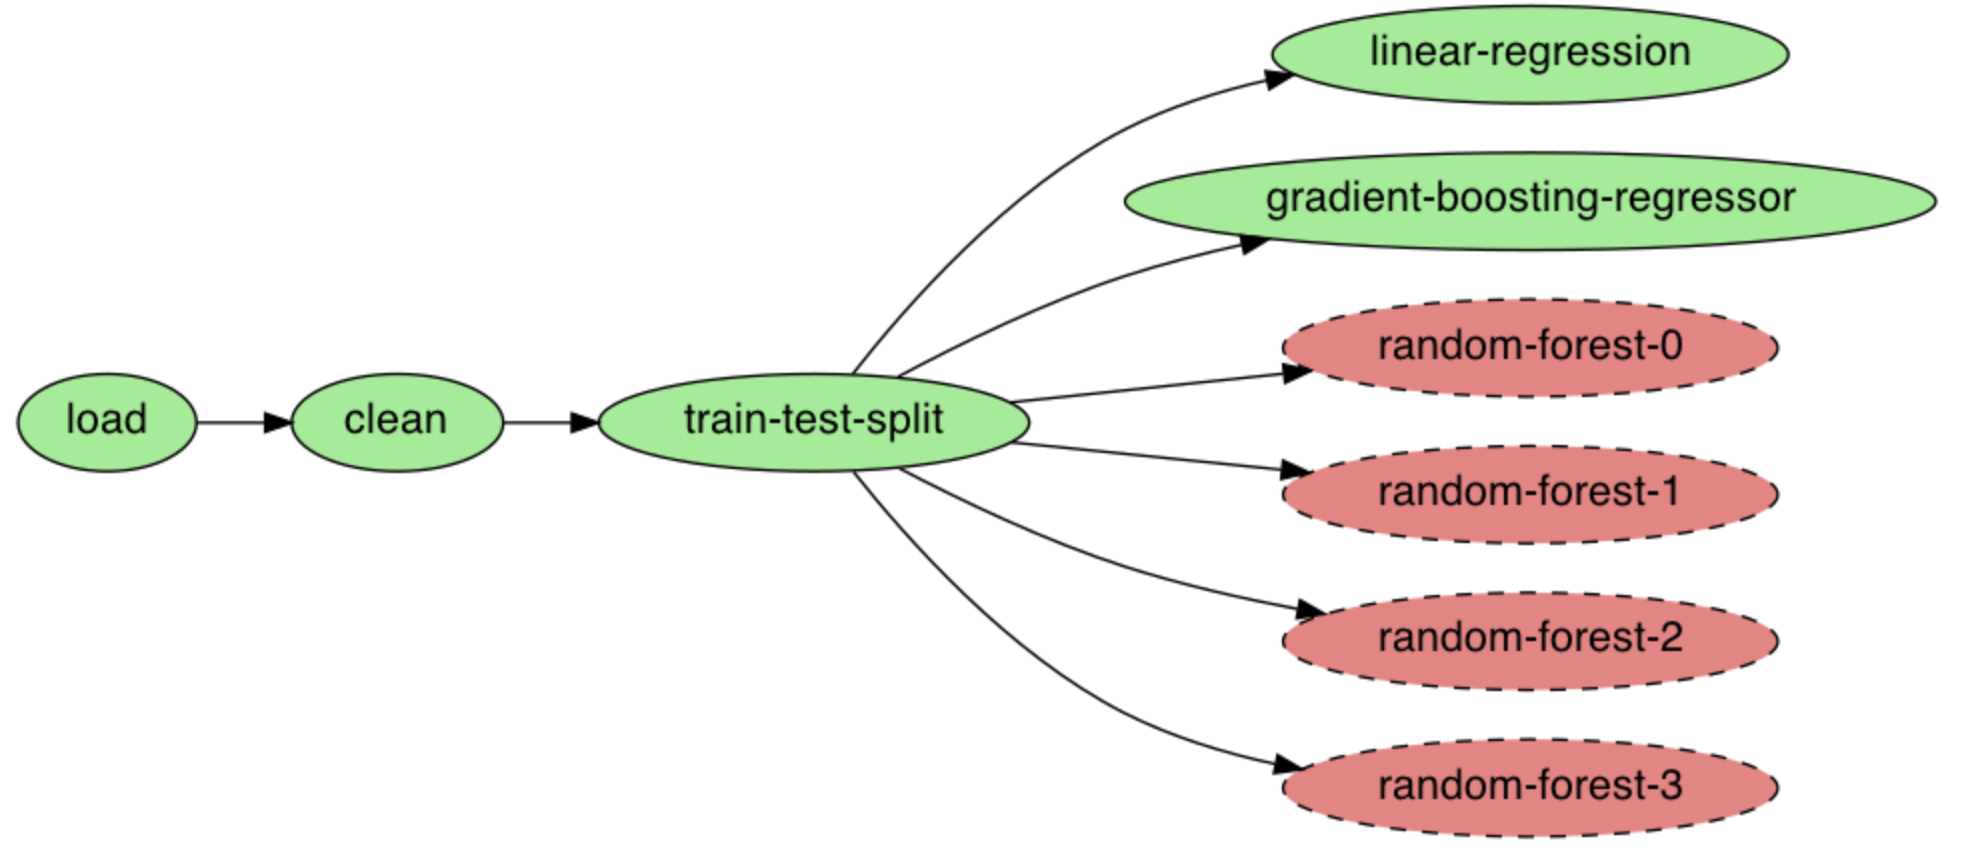
ploomber plot
Figure 9:We can see this pipeline has multiple new tasks.
ploomber buildExecution in the cloud
When working with datasets that fit in memory, running your pipeline is simple enough, but sometimes you may need more computing power for your analysis. Ploomber makes it simple to execute your code in a distributed environment without code changes.
Check out Soopervisor, the package that implements exporting Ploomber projects in the cloud with support for:
Resources
Thanks for taking the time to go through this tutorial! We hope you consider using Ploomber for your next project. If you have any questions or need help, please reach out to us! (contact info below).
Here are a few resources to dig deeper:
- GitHub
- Documentation
- Code examples
- JupyterCon 2020 talk
- Argo Community Meeting talk
- Pangeo Showcase talk (AWS Batch demo)
- Jupyter project
